
Ok, so I'm getting closer to finishing this thing and figured I'd post some images with everything kind of pieced together. I decided to make it a box rather than a full desk because it will be easier to move if I ever have to. I went with Oak, which is a more expensive wood, so one can be made even cheaper than this one. A lot of cheaper furniture you might buy and possibly even the light boxes online are made out of MDF, medium density fiberboard, and then covered up with Formica, which is the slick covering on most counter tops. The sheet of oak plywood was $42 and I have enough left over to make another disc and desktop. I've stained and applied 2 coats of clear to both the box and disc. I left the back of the disc and the inside of the box unstained since it won't be seen. The inside of the box will probably have a layer of tinfoil to reflect the light. I did apply the two coats of clear to the bottom of the disc though, just as a basic sealer to the wood.
The glass was $8 and the Plexiglas was $6. I wanted to size it out so I could use 16 field paper if I wanted to, so it measures in at 12" by "18. The glass was cut to that exact size from a local glass company and my dad was able to get one of the scrap pieces of Plexiglas that we ended up cutting to size. The only problem with it is that it is 1/4" thick when we I was looking to get 1/8" so I could place it directly underneath the 1/8" piece of glass in the disc. So I'll end up screwing the plexi into the underside of the disc, and inset the glass to draw on into the top of the disc.
Because of this thickness difference in the Plexiglas I was kind of worried about how well the light would diffuse overall and didn't want to run into dark spots so I went with two florescent bulbs with a higher wattage to be safe, since the circular bulbs that most people go with are only around 32 watts. You can find the circular setups with the fixture at a Home Depot for $20. The way I'm going will also make it cheaper, but with more wattage there is more heat, so I'll soon find out if I get any issues from that. I don't think it will be that big of a deal, but we'll see if the paper I'm drawing on goes up in flames :) I should also note that we made the circle cuts with a router and an attachment that allowed use to set a pivot point in the center, so the router will cut it out nice and clean.
Here are some more pics:

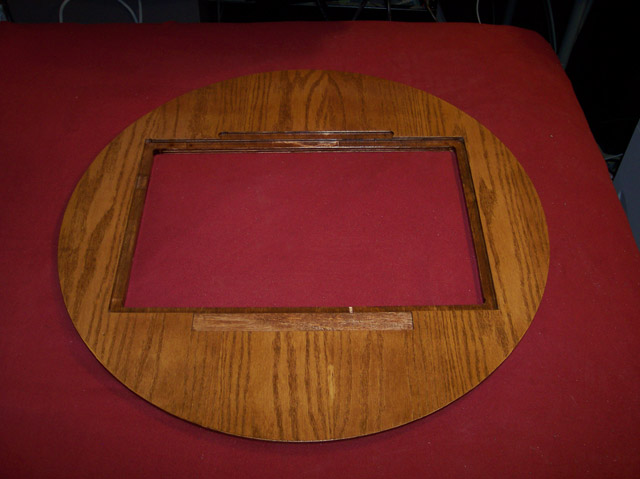
Here's an image of just the disc with the router work for the glass and pegbars:
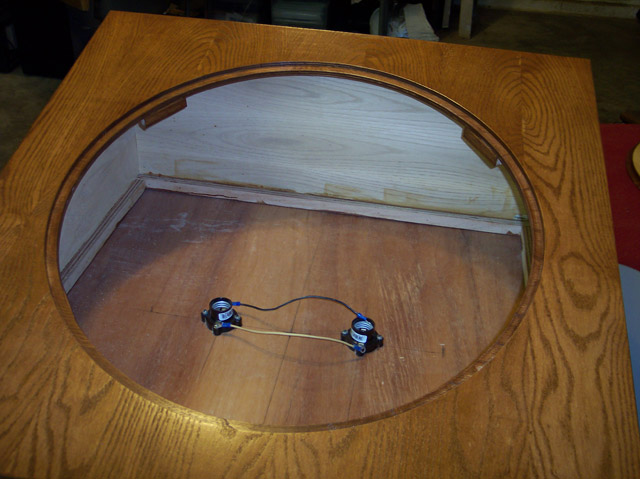
And the last few images are of the box and disc where you can see the edges have been routed so the disc will fit inside of it and sit level with the top of the surface. We did the same with the back of the disc, routing it halfway through the wood.

Once I finish it all up I'll take some more final pics and give a summary about how much everything cost.
6 comments:
oooo!! pretty!!
saaaweeeet! Make me one while you're at it eh?
That looks awesome.
hey adam,
just came across your blog.....am getting back into AM in the near future and was adding some RSS feeds....nice light box...very cool.
Nathan
give me your table or feel the wrath of gorgilon
You might want to put some finger holes at the top and bottom of your disc to make it easier to spin.
Looks great!
Post a Comment